Monday, November 30, 2015

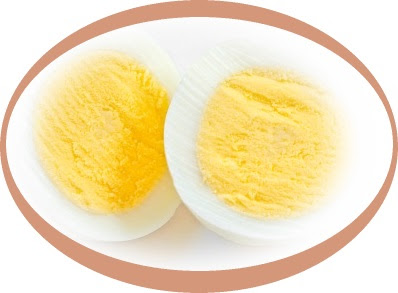
Boiling the perfect hard-boiled egg used to elude me. While the prep seemed easy enough, my results were hit and miss.

So now you're here with the same dilemma. You want an egg that turns out just right every time and one without a dark line around the center and finally one that is easy to peel. Right?

How can fixing this simple food be so easy to mess up, you may have wondered?

Well it turns out the recipe can be tricky if undertaken too casually. How do I know? Because I have to admit that over the years I've had my share of less than stellar results.

In spite of this I was determined not to give up and kept tweaking the process, or just tried to pay more attention to the timing.

Gradually I started to have more winners than losers, but I still wanted to find a way to have those little ovum turn out just right every time and... eventually I did. And now to save you a lot of frustration, I'm going to share my method for perfect hard-boiled eggs.

There'll be no more failing miserably if you follow it to the letter. Let me repeat that in another way so there's no misunderstanding: follow this technique exactly!

Actually read the directions a couple of times and then follow exactly.

I know I'm being repetitive, but I want you to enjoy the sweet feeling of success when you conquer this once and for all!

OK, let's get started.

How many eggs do you want to cook? Let's be brave and start with a dozen.

  • Take out a large pan - one with high sides like a stockpot or something that will allow the eggs to be in a single layer.
  • Set the eggs inside and cover with cold water until the level is exactly one inch above them.
  • Place the pan on the stove over high heat and at the precise moment the water reaches a boil, turn it off and remove from the burner.
  • Cover with a lid and set your timer for exactly 17 minutes.
  • While you're waiting, fill a large bowl with ice water.
  • Then as soon as the time is up, using a slotted spoon, immediately move the eggs to the cold water and chill for
    exactly two minutes.
  • While the eggs are chilling, bring the cooking water back to a boil and then quickly move all the eggs back into the pan of boiling water. When the water returns to boiling, boil for ten seconds.
    (This step makes it so much easier to peel later because the shell expands away from the contents (but this step must be done quickly.)
  • Now once more it's time to transfer the eggs back into the ice water and let sit for 15-20 minutes - chilled eggs are easier to peel.
And there you have it, if you follow this method precisely, your quest for perfect hard-boiled eggs will be a thing of the past.
So go for it and see for yourself!

Notes:
All that chilling between steps may seem arduous, but you'll be rewarded for your efforts because you won't see that yucky dark line around the yolk.

Refrigerated Unpeeled eggs keep for up to a week. After peeling, submerge them in a container of water, uncovered, and they will last in the fridge for up 3 days.

Another tip to keep in mind when hard-boiling eggs, is that eggs 7-10 days old will peel easier than fresh ones.
Monday, November 23, 2015

A Delectible Set of Specialty Salts For Cooks
Venturous cooks will find endless ways to use this gift of specialty sea salts in their recipes all year long.

There are many unique flavors in the assortment. Each one is contained in its own sealed vial and arranged in an attractive display rack that can be placed on the kitchen counter for that designer touch, or just to show off!

I think it's a lot of fun to just jump right in and try adding these seasonings to various foods to see what yummy results you come up with.

OR, sprinkle a pinch on finished dishes such as potato salad, pastas, cooked vegetables or dinner salads to become familiar with each one.

My first impression is the "wow" factor they add to these type of dishes along with that little bit of crunch many of us enjoy.

Those that love to cook as much I do, will have the most fun experimenting on their own with various pairings. I like to use them in rubs for meats and fish I'm planning to prepare.

I especially like the smokey ones by themselves or in a rub recipe combination.

For those that enjoy adding a little uniqueness to their cooking, this set is a great way to turn an ordinary recipe into an awesome recipe!

Wednesday, November 11, 2015

Cutting Mats Gift For Cooks
You can't go wrong going with a gift of cutting board mats for people who love to cook. They are an absolute necessity anytime a meal is being prepared.

It dawned on me the other day, that with the entertaining season right around the corner, I could really use some extra ones myself.

Plus, I spend a lot of time cooking anyway, it's my passion! And I often prep ingredients for more than one recipe at a time when I'm in the kitchen.

So, why haven't I gifted myself with a few more of these? Good question, especially since it a hassle to wash and dry a mat or board every time a clean one is needed.

I guess my only excuse is that I don't like to go out shopping and when I'm online buying dog food or something else, I just don't think about it.

Well today that changed and I decided to gift myself with the set you see above. While I do have quite a few heavy duty boards such as acrylic or bamboo, they do take up more of my limited space and some can't be used for cutting meats.

I think any cook would welcome the addition of the chopping mats I chose plus the nice surprise cookbook that comes with them. Like most people who enjoy cooking, I'm always ready to try some new recipes!

Highlights of the Cutting Boards

  • Storage is a premium in my kitchen so I decided on these because they can be rolled up and don't take up much space in a drawer, or can be attached with a magnetic clip to the side of the fridge.
  • I like that this particular set is thicker than ones I've had previously making them more stable and not likely to curl up as some do. They also have a special non-slip backing to keep them grounded on the kitchen counter.
  • The generous size is great for when larger quantities of food are being prepped, say for a stir fry, which just happens to be one of my favorite eats!
  • Each one in the set is a different color and is imprinted with a food image as a reminder to keep foods safely separated: like meats, fish, vegetables and/or fruits. But even if I mess up, it's nice to know the surfaces have added protection against microbes and stains. Only time will tell how well they resist staining, but I'm not stressing on that one.
  • Finally for those cooks concerned about BPA - no worries, it's not there.